
It's the Simple Things
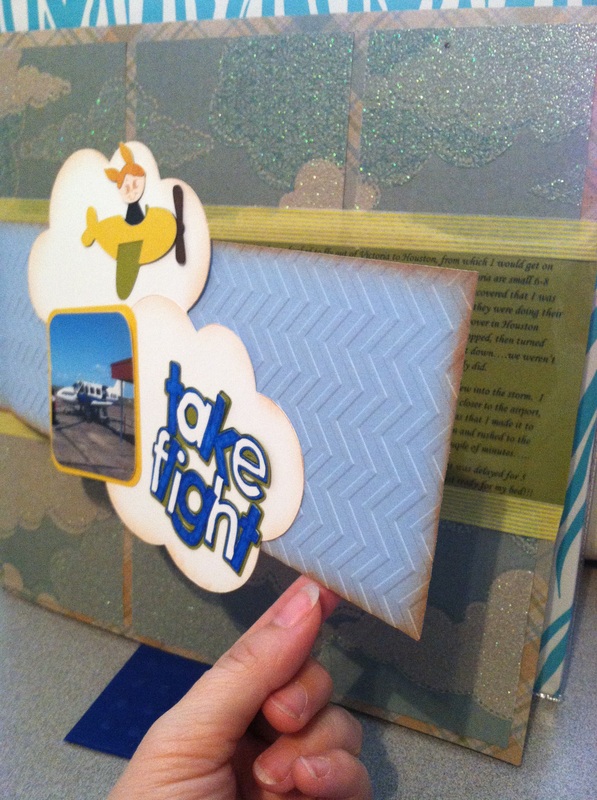
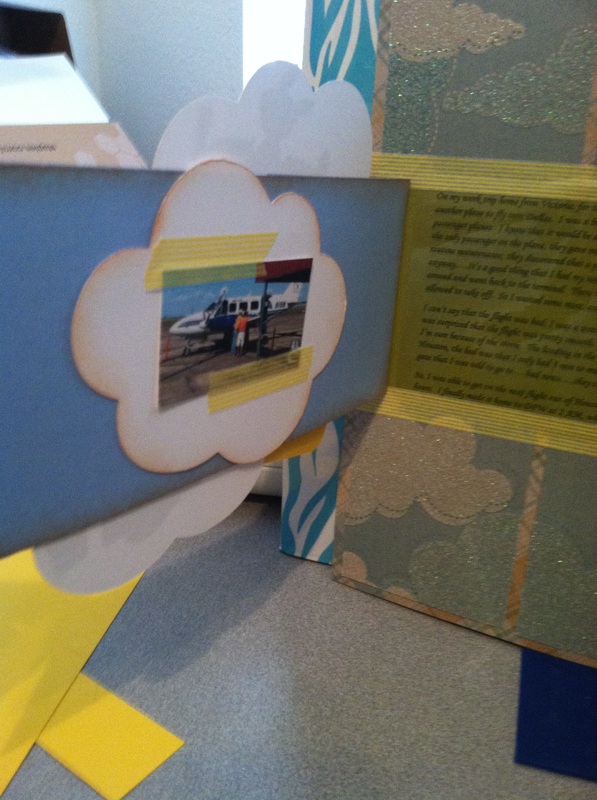
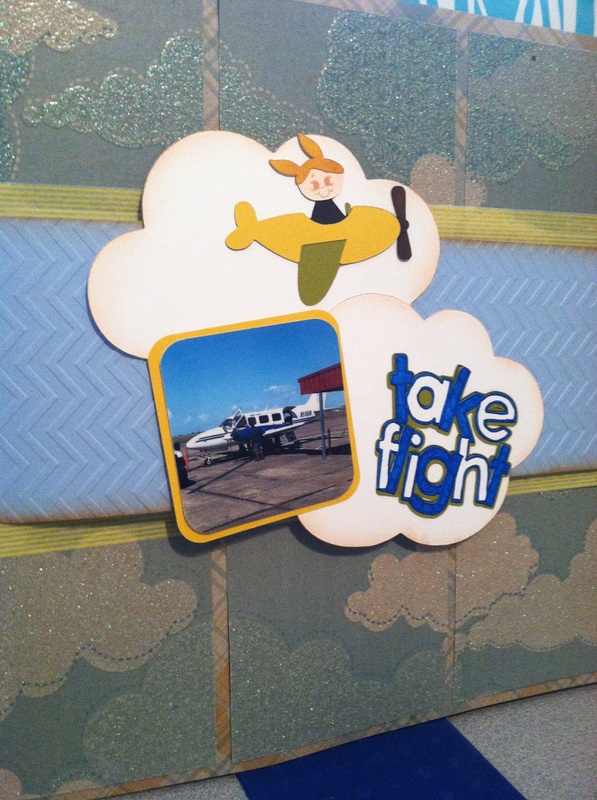
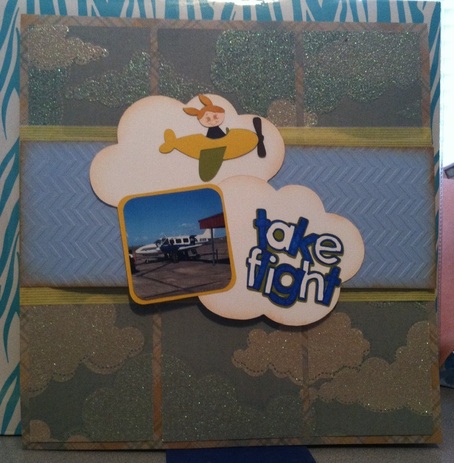 What do you do when you have a great story to tell, one that you want to preserve in a scrapbook, but don't really have any pictures to go along with it? I choose to create a scrapbook layout that will focus on the story, and use decorative items to create a beautiful page. That is what happened with this page. It is about my journey from Victoria to Houston to Dallas, which was quite a trip. Let's just say it involves a 8 passenger plane, a storm over Houston, and a lot of waiting around in airports. I only had two small pictures, and they weren't very good pictures at that. So, I did a lot of journaling, which you can't see in this picture, but you can see where I hid it below in the next set of images.
Materials Used: Cricut: Beep Beep, Craft Room Basics, & Simply Charmed Paper: DCWV - The Playtime Stack Ink: Tim Holtz Tea Die Distress Ink Stamp: Peachy Keen Face Stamps Cuttlebug: Darice Chevron Embossing Folder Other: Spectrum Noir - EB5, TB6, & FS6; Blue gelly roll pen, Recollections yellow strip washi tape, & transparent sheet with journaling on computer. Challenges Entered: Die Cuttin Divas Paper Playtime Frosted Designs Scrappy Mom Stamps My Craft Spot Cuttlebug Mania  Blog Update: December 11, 2013
My Take Flight Layout was showcased on the Die Cuttin' Divas challenge site. This was a sketch challenge, that I don't normally participate in, but this one really inspired me :)
10 Comments
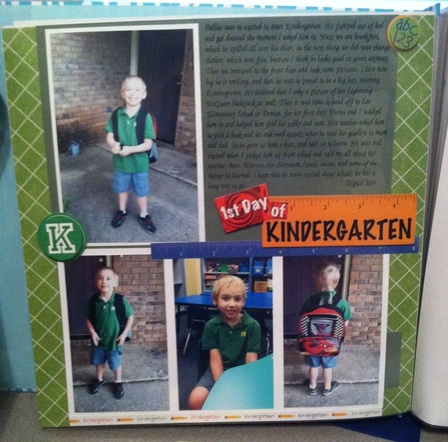
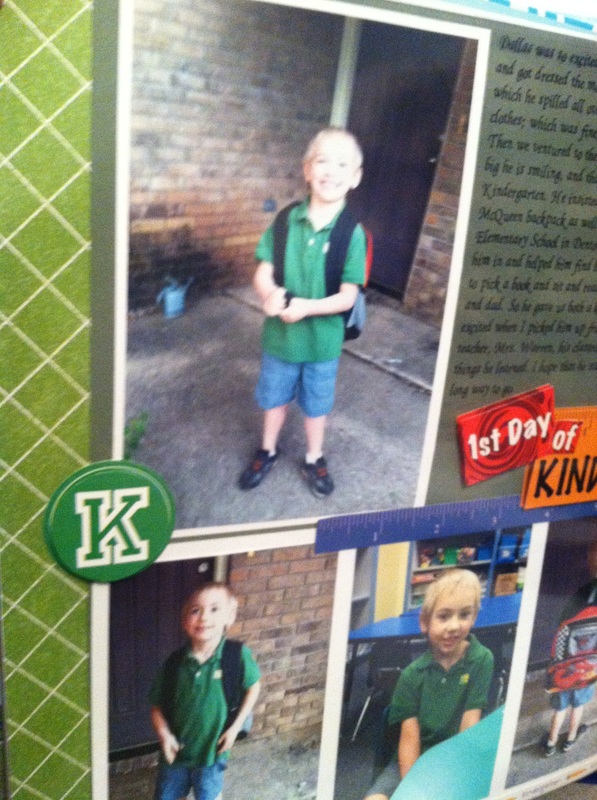
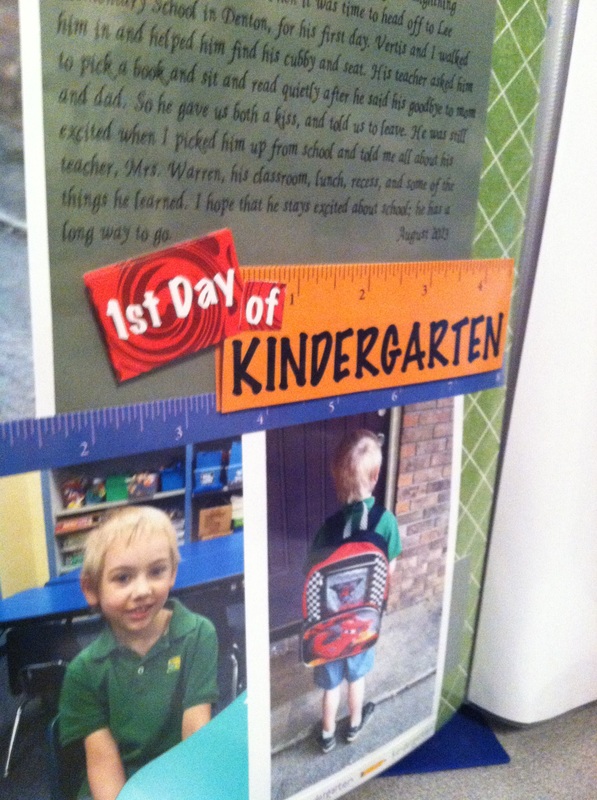
Now that we are into the 3rd, 6 weeks of Kindergarten, I finally got my "First Day of Kindergarten" layout finished. At least I'm not too far behind. I love how big his smile is and how proud he was to start school. (Oh, and I had to take a picture of his Lighting McQueen backpack too!) I found this sketch somewhere, sorry I don't remember where, and knew that it would be perfect for this layout. I had also found these cute Stickabilities stickers on sale, so I bought two and layered them on top of each other to add some demotion and cute details. The layout was really easy, I just matted all the pictures using white cardstock, printed my journaling on a transparency, then glued it all together. I love how it turned out and it only took about 30 minutes to complete. Materials Used: Paper: The Paper Studio - Little Boys and Their Toys Stack Stickers: Kindergarten by Stick-a-bilities (The Paper Studio)
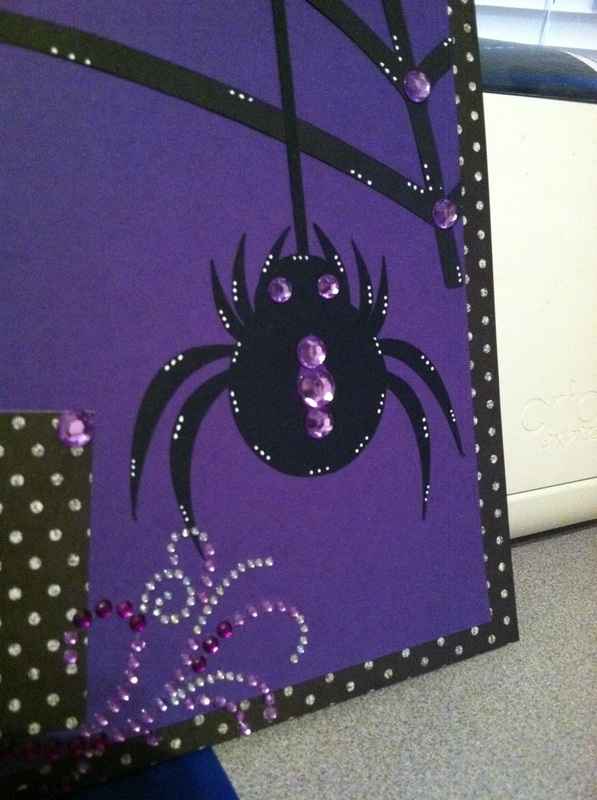
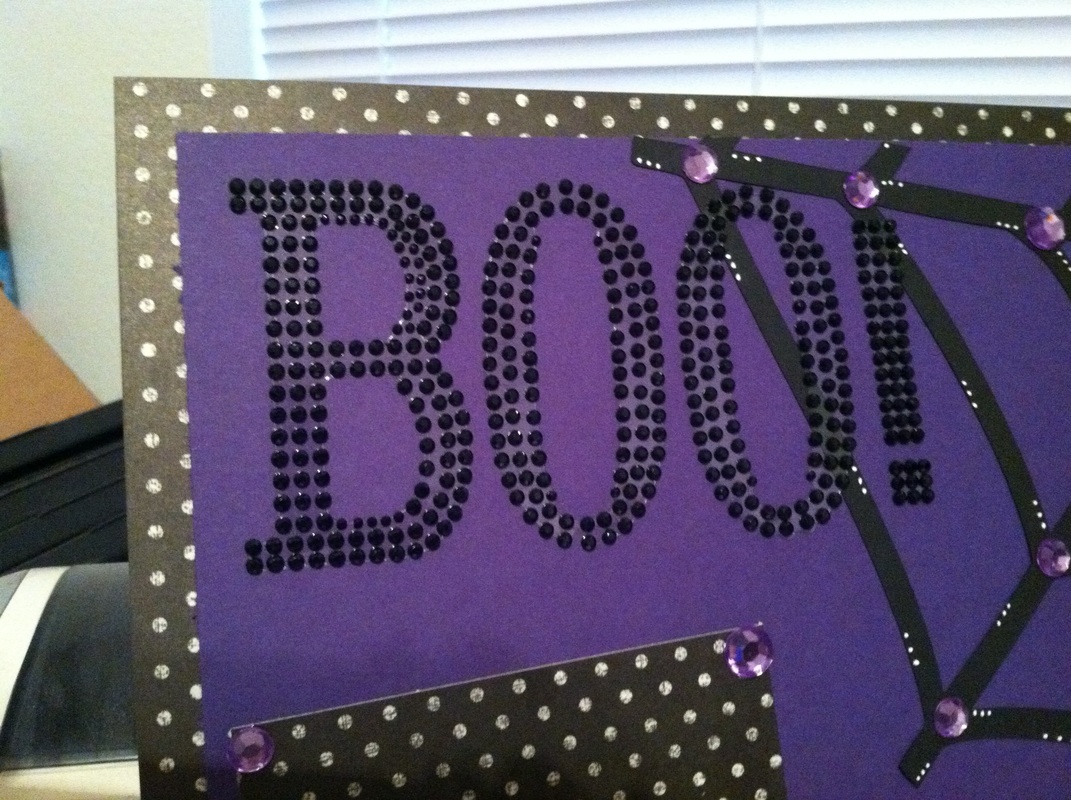
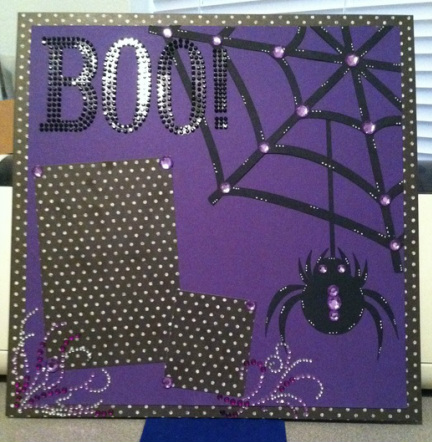 Everyone who knows me, knows that purple is my favorite color. So much, that way back, when I bought my first vehicle, that my only two desires was that it was a truck and that it was purple. I ended up buying a purple, 1995 Ford Ranger, which I loved and drove for years (until I traded it in for a "grown up" SUV". Anyway, when I found out that the challenge this week was to create a project using black and purple as the main colors, I got really excited. Don't forget to head on over to Fantabulous Cricut to link up your project, and don't forget you must use at least one Cricut cut. I had found this wonderful rhinestone "BOO!" sticker at Michaels and knew that I had to use it. I cut the spider and web using my Cricut and my Happy Hauntings cartridge, then just put everything together and dressed it up using some purple and clear rhinestone stickers, the Boo sticker, and a white gelly roll pen (I think the white dots on the spider make her look really scary). I love how this layout turned out, now if Halloween will just get here, I can add the pictures and put it in my 2013 scrapbook.
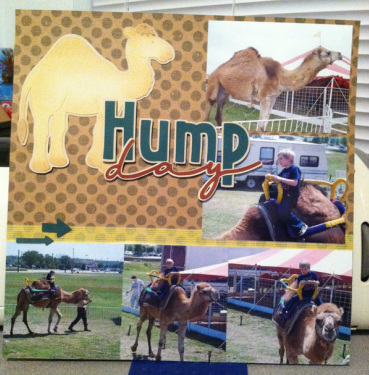
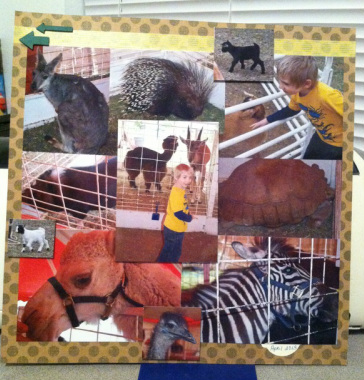
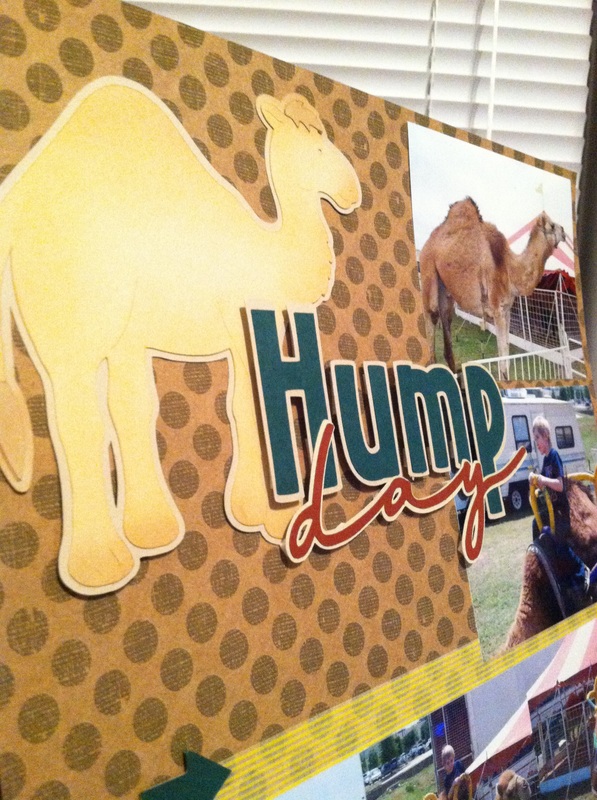
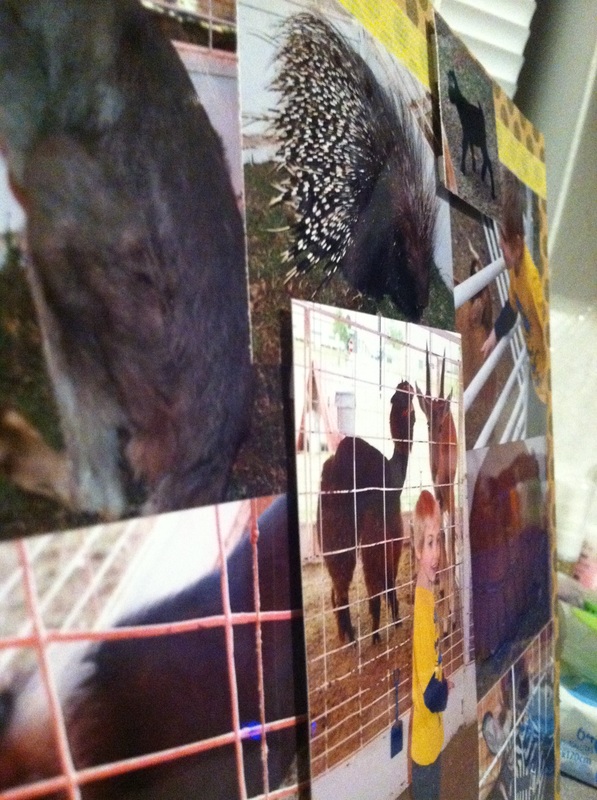
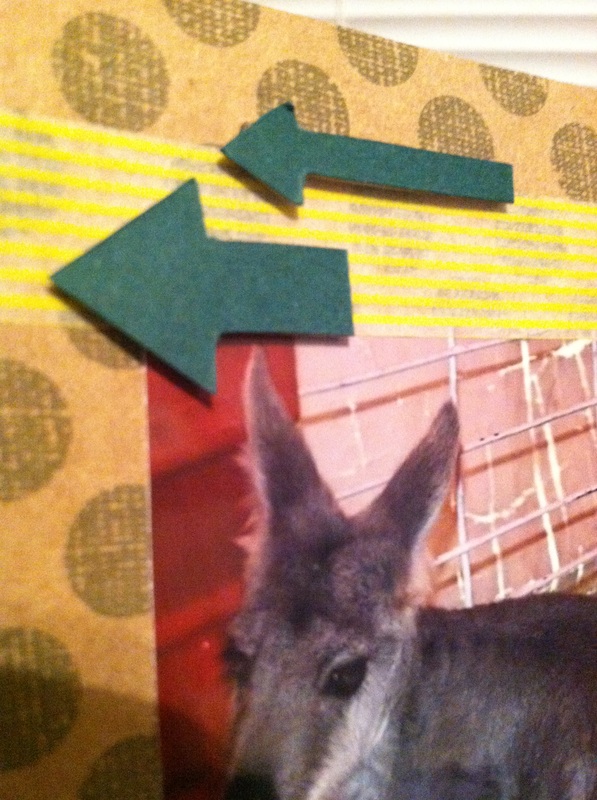
I couldn't help myself. I love the Hump Day commercial, and it was the first thing I thought about when it was time to scrap my son's visit to the petting zoo. He was so excited to get to ride the camel, and wanted to do it over and over again. I really like this layout, and how I was able to get 16 pictures on it. I started by cutting the title and the camel using my Cricut. I love the Animal Kingdom cartridge, and wish I had more opportunities to use it. I then used chalk to give the camel some color, using a tan, light brown, and yellow and blending them all together. Next I cut all the pictures to as small as I could, and started layering them on the paper. I wanted all the camel pictures on one page, since that was the highlight of the trip, and the pictures from the petting zoon on the other. I lifted some of the pictures using foam tape, which I think looks awesome and gives the page some depth. I finished it off with some yellow strip washi tape and some little green arrows that I covered using cardstock.
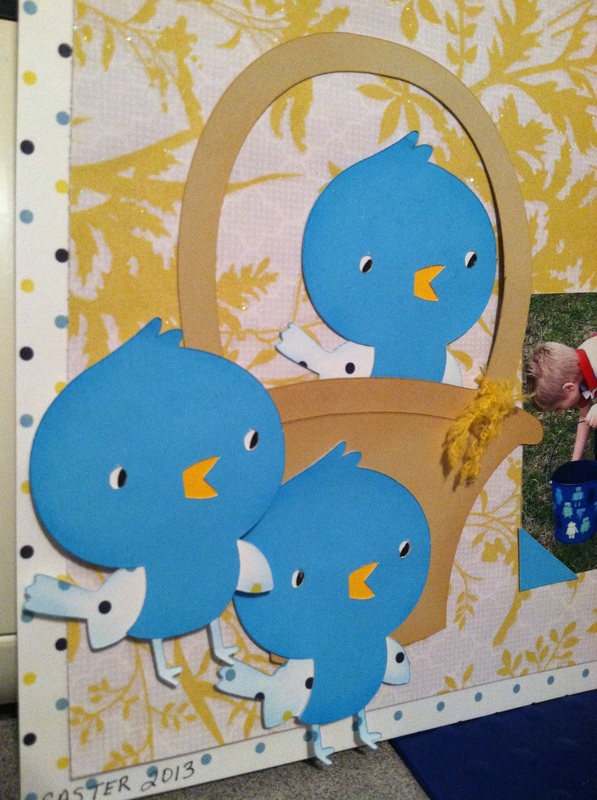
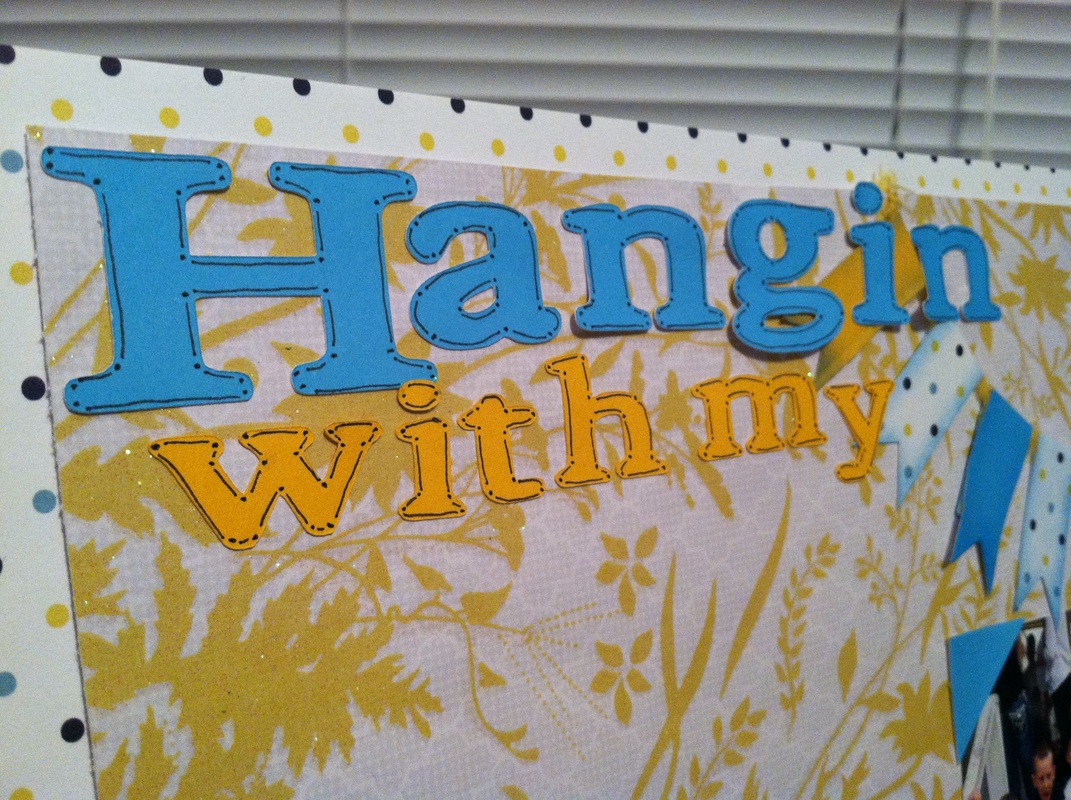
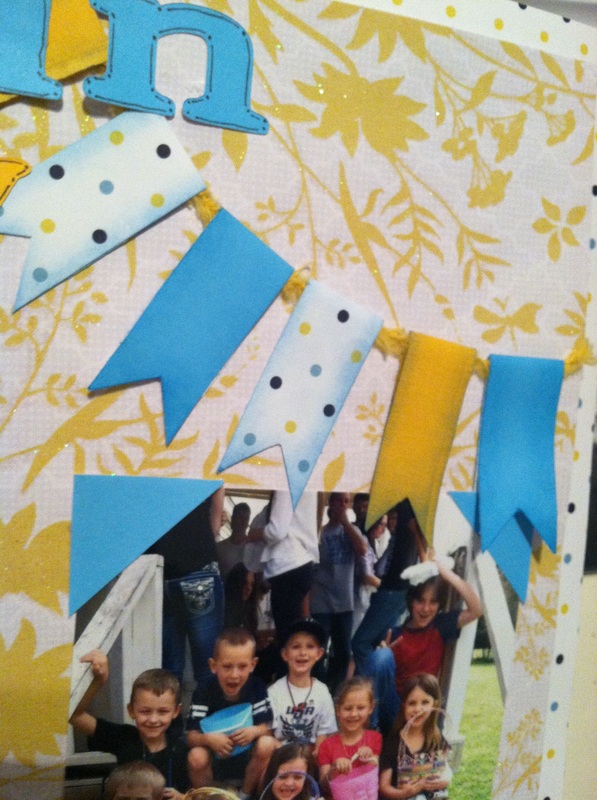
Materials Used: Cricut: Animal Kingdom and Opposites Attract Paper: The Paper Studio - Pocket Full of Posies & Recollection Cardstock Other: Washi Tape by Recollections, Chalks by Craft T Productions, Foam Tape, Chipboard Arrows, Cream Color Tag (It's tucked at the bottom of the second page under a picture and used for journaling. Challenges Entered: Cards TV Hiding in my Craft Room Cupcake Inspirations Frosted Designs Die Cuttin Divas Here is the Hump Day Commercial, incase you haven't seen it!!! And if you are a Dallas Mavericks Fan, then you will love this spoof on "Hump Day" by Dirk!!! 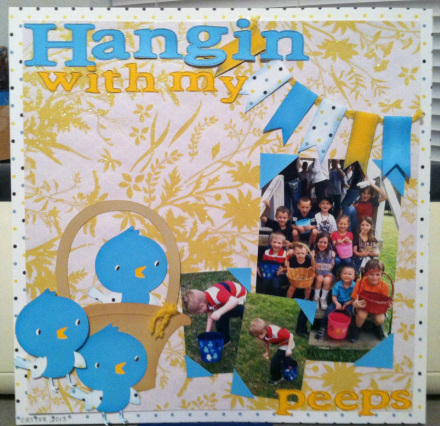 I have decided that I needed to spend some time away from making cards and catch up on my scrapbooking. Though I have found that making cards is a lot of fun, scrapbooking: documenting and telling our family story will always be my main focus. I found the title "Hangin with my peeps" online and thought that it would be perfect for my pictures from Easter. We have a big, big family with lots of kids and I love that we take a picture of them all on the porch steps just before the big Easter egg hunt. The problem now is that there are so many of them, that it's impossible to get them all to look the right way, not make a face, and smile all at the same time. It's ok, I love the pictures anyway...maybe more because they aren't perfect. I used glitter paper and cardstock from Recollections, but the title, basket, and little birds using my Cricut, and one of my favorite cartridges, Create A Critter 2. The ribbon is all from my scrap stack. I used chalk to "ink" the edges of all the die cuts and the banner. Then used a black zig pen to doing some pen work around the edges of the letters (they needed something to help them stand out). I really love this page, and think that it is super cute.
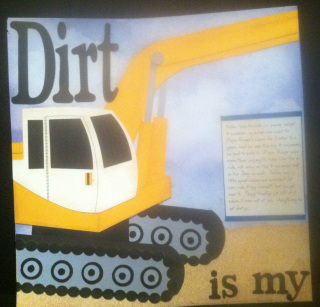
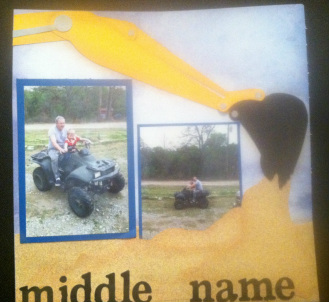
I am sad to say that I just finished my 2012 scrapbook yesterday. It's already May 2013, oh well, I guess it's not too bad, some people are years behind. I wanted to get a start on my 2013 book, but was feeling a bit uncreative. I don't use a lot of scrapbooking kits, but they are perfect for this kind of project. I needed something easy to jump start the new year's scrapbook. This kit is from Legacy Paper Arts. I bought it at one of the three scrapbook conventions I have been to in the past year. I didn't follow the directions the exact way. It included "dirt" that was to layer over the word "Dirt", but I didn't want to make a mess, as I did not have a strong enough glue to ensure it wouldn't fall off. So I used chalk instead, and used it all over the page to make it look dirty. I know that construction and 4-wheelers don't exactly go together, but my Dad works in construction and both him and my son love getting "dirty" so it fit enough for me. PS. Sorry for the bad pictures, the light was bad in my craft room today.
|
 
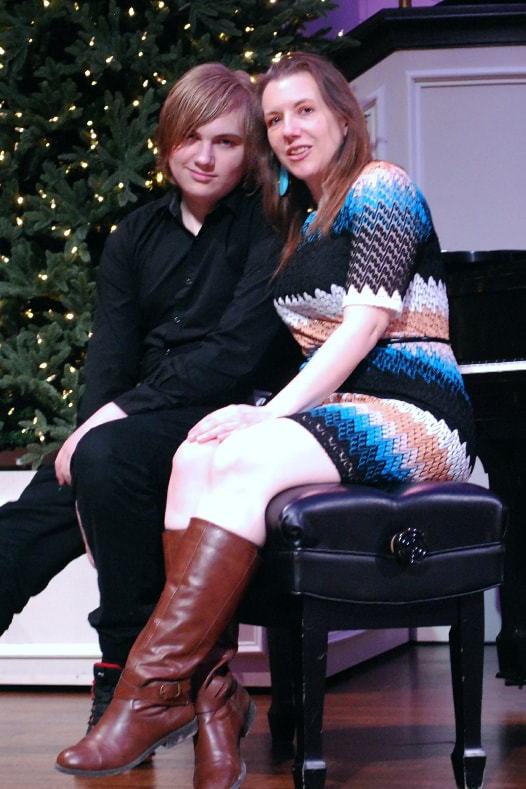
JoNeita & Dallas - Dec. 2021
About MeMy name is JoNeita Kelly and I have been crafting for at least the last 20 years. I live in Forney, Texas with my son, Dallas. I am a High School teacher and Cheerleading Coach. I love to craft and to continue to improve my photography and editing skills whenever I have free time. What I love most is telling our story using pictures, it is the most important gift I can leave my family. 
Photo by Steven Mackie Photography.
Categories
All
Archives
December 2021

Former Design Team Member for Fantabulous Cricut Challenge Blog
 |


 RSS Feed
